contact us

Use the form on the right to contact us.

You can edit the text in this area, and change where the contact form on the right submits to, by entering edit mode using the modes on the bottom right.


123 Street Avenue, City Town, 99999

(123) 555-6789

email@address.com


You can set your address, phone number, email and site description in the settings tab.
Link to read me page with more information.

Blog

Butteryum food blog recipes

Filtering by Category: 4th of July recipes

Low Country Boil

Patricia @ ButterYum

low.country.boil.1_butteryum.jpg

We have good friends who hail from “The Low Country” and they recently treated us to an authentic low-country boil. Not only was it incredibly delicious, it was also incredibly fun. I couldn’t resist recreating it at home a few days later.

The recipe below is cooked on the stovetop and makes enough to feed 4. To feed a larger crowd, scale the recipe up as much as you need and take the cooking outdoors using a turkey fryer setup.

To begin, we need to make the cooking liquid. It’s super simple - all you need is water and old bay seasoning.

low.country.boil.3_butteryum.jpg

Bring the water and old bay to a boil.

low.country.boil.4_butteryum.jpg

Add the potatoes and let them boil for 10 minutes.

low.country.boil.5_butteryum.jpg

Next, add the corn to the potatoes and cook for another 1o minutes.

low.country.boil.6_butteryum.jpg

Mmmm…. it’s starting to smell pretty good in here!

low.country.boil.7_butteryum.jpg

Okay, time to add the sausage to the pot and cook for 5 minutes (this is when I like to start covering the pot).

low.country.boil.8_butteryum.jpg

And lastly, add the shrimp and continue cooking just until they’re done (this will only take a few minutes). No need for the shrimp to be completely submerged in the liquid - covering the pot with a lid will allow the steam to cook them through.

low.country.boil.9_butteryum.jpg

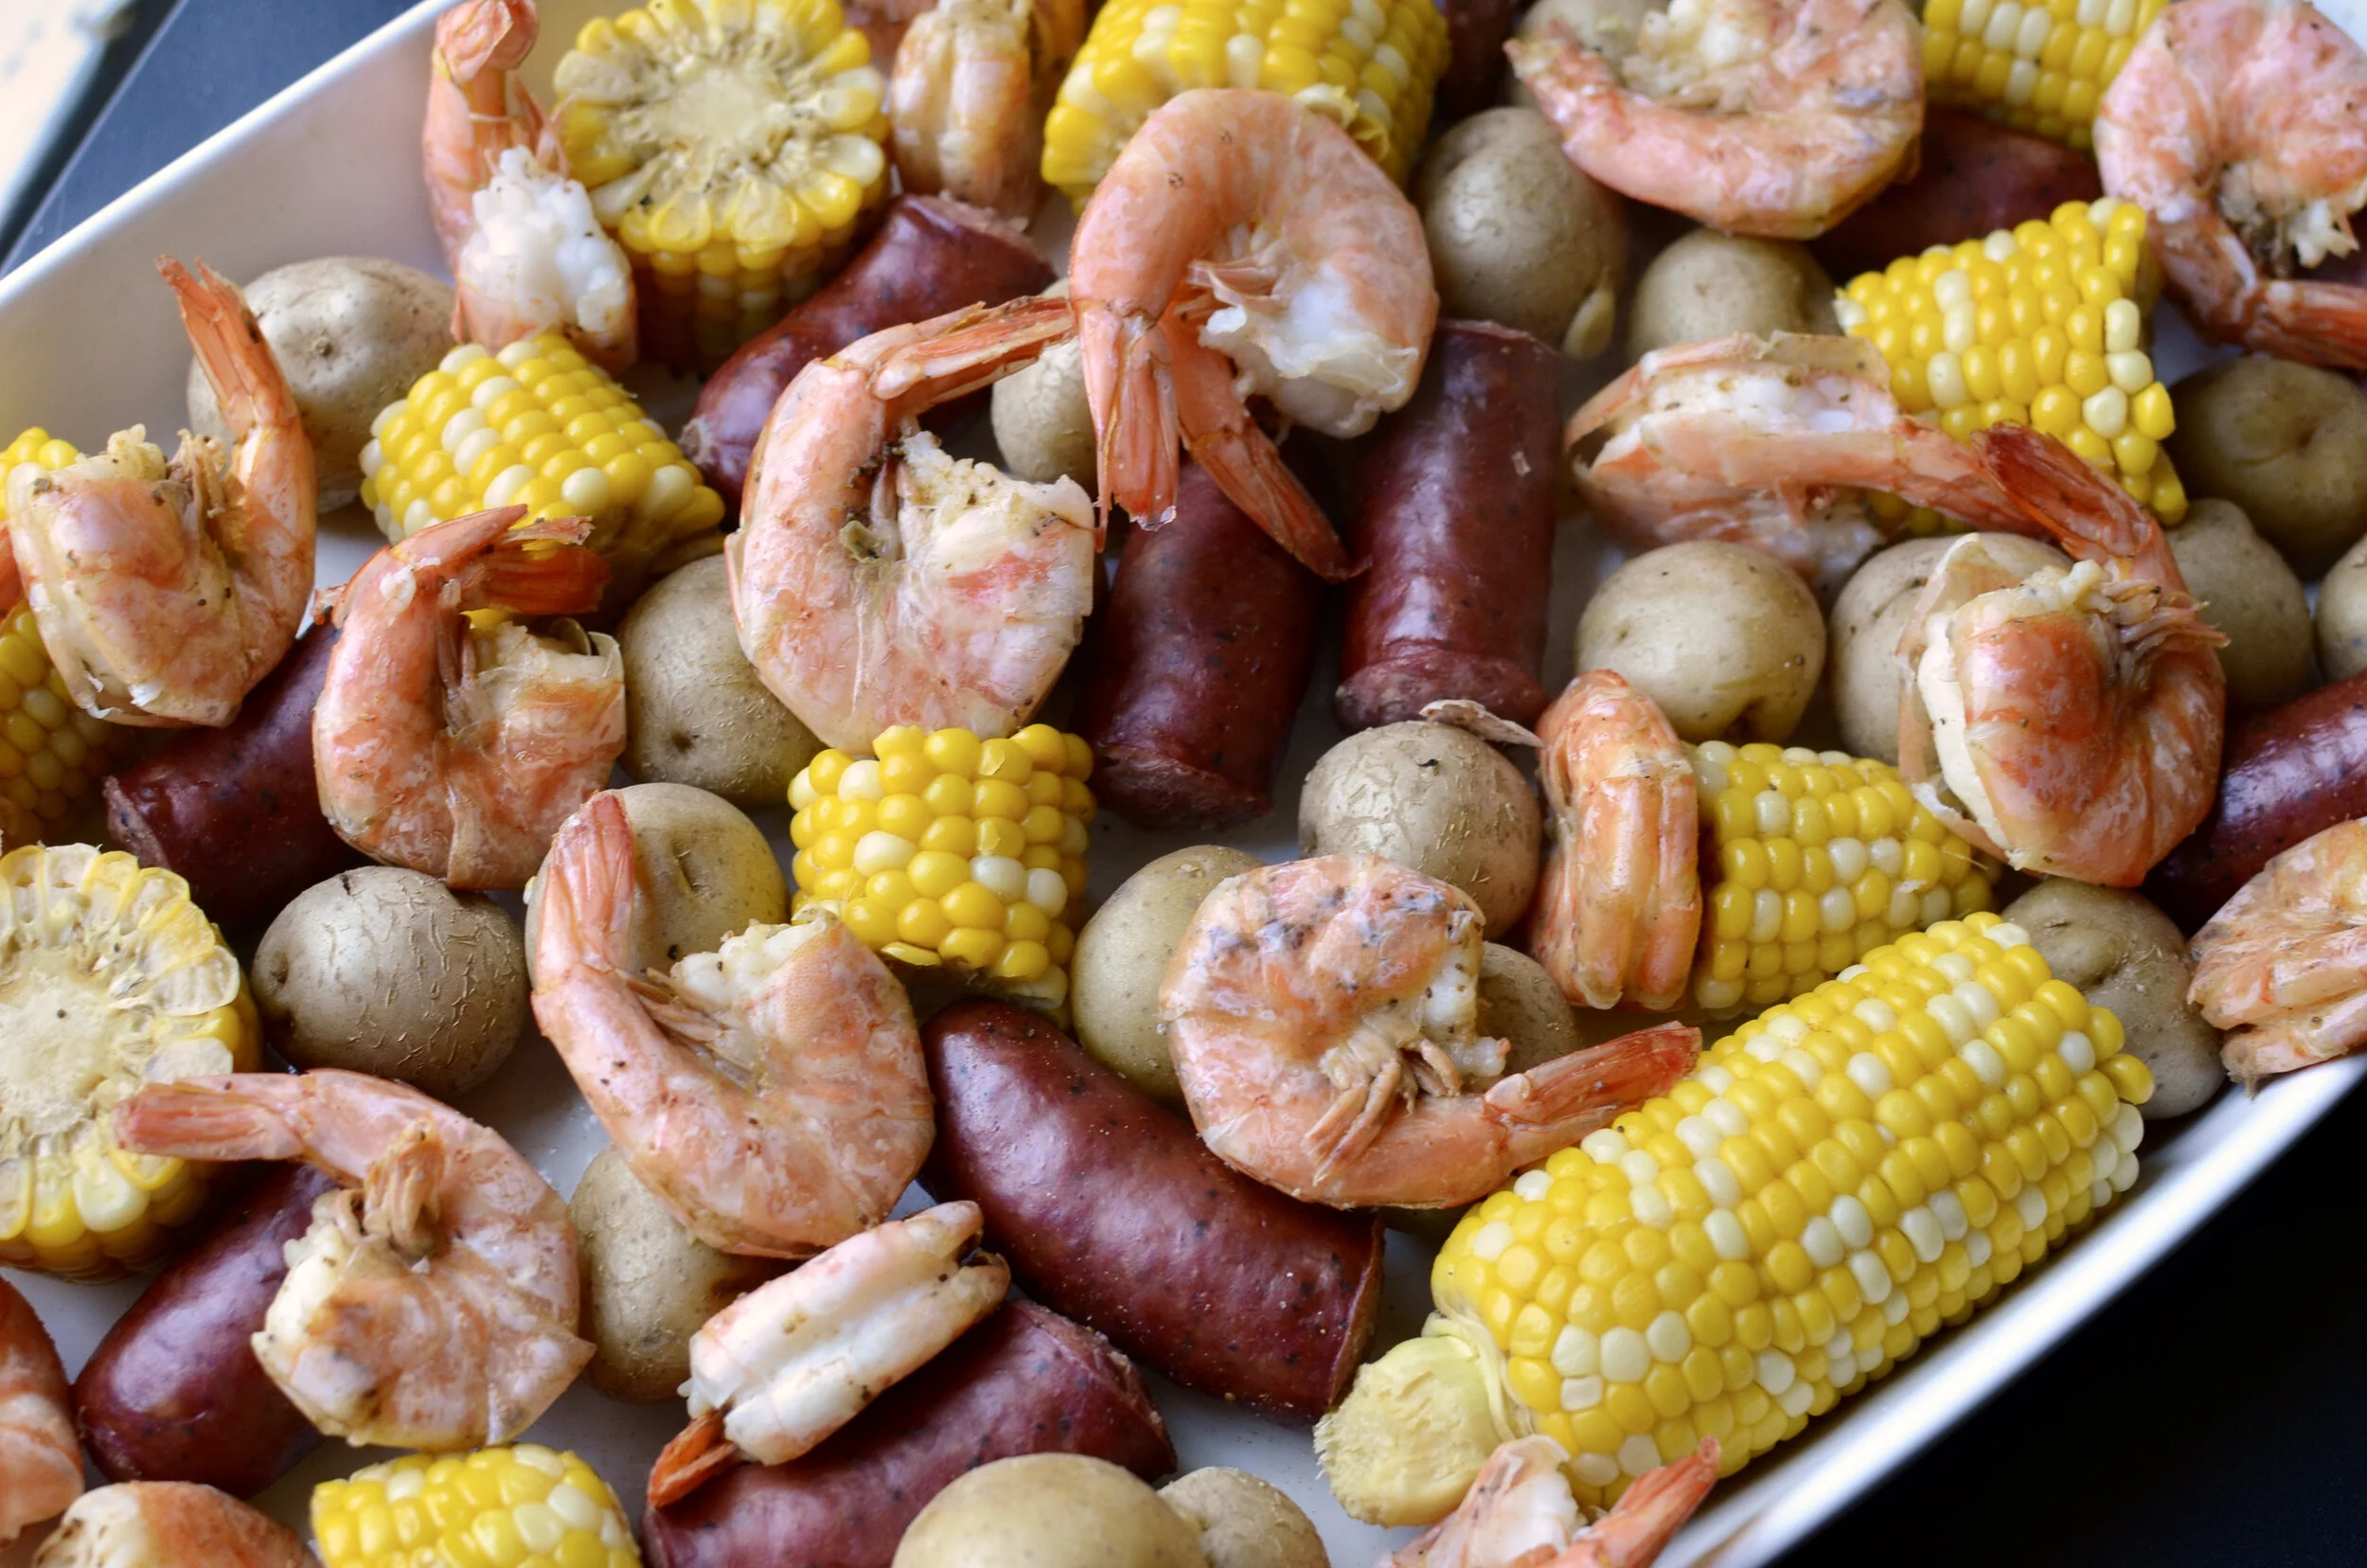
And that’s all there is to it - super simple and super delicious! Remove everything from the cooking liquid and serve with butter, lemon wedges, cocktail sauce, and if you have it, chopped fresh parsley.

For the most festive presentation, serve directly on a table covered with several layers of newspaper (see notes below). When it’s time to clean up, just roll up the newspaper containing all the empty corn cobs and shrimp shells and throw it away.

PS - Don’t forget the paper towels. Enjoy!

Items used to make this recipe:

(affiliate links)


Authentic Low Country Boil

makes 4 servings

Printable Recipe

Ingredients

  • 8 cups water

  • 6 tablespoons old bay seasoning (or more)

  • 1 1/2 pounds red skinned potatoes (about 2-inches in diameter)

  • 6 ears corn, shucked and cut into 2 or 3 pieces

  • 1 1/2 pounds smoked sausage links, cut into 3-inch lengths

  • 1 1/2 pounds shell-on, deveined shrimp

  • Garnish: melted butter, lemon wedges, cocktail sauce, chopped fresh parsley

Additional:

  • lots of napkins or a roll of paper towels

Directions

  1. In a 10 to 12-quart stockpot over high heat, combine water and old bay seasoning.

  2. Add potatoes and bring to a boil for 10 minutes.

  3. Add corn and continue cooking for 10 minutes

  4. Add sausage, cover the pot, and continue cooking for 5 minutes.

  5. Add shrimp, cover the pot, and continue cooking just until the shrimp are opaque and cooked through, about 2-3 minutes (it’s okay if the shrimp aren’t submerged in the cooking liquid).

  6. Turn off the heat; remove potatoes, sausage, corn, and shrimp from cooking liquid and serve with butter, lemon wedges, cocktail sauce, and plenty of paper towels.

Notes

  • Feel free to add a sliced onion or two to the cooking liquid.

  • Feel free to add a beer or two to the cooking liquid.

  • If your stockpot has a pasta insert that’s deep enough to hold all the ingredients, use it. It will make removing the cooked ingredients from the hot cooking liquid fast and easy.

  • Feel free to add additional seafood such as oysters, clams, crab legs, crawfish, etc.

  • Some sides to consider: coleslaw, crusty bread, sliced fresh garden tomatoes.

  • Low country boil is also known as “lowcountry boil” and “frogmore stew”.

  • For the most festive presentation, serve directly on a table covered with several layers of newspaper. When it’s time to clean up, just roll up the newspaper containing all the empty corn cobs and shrimp shells and throw it away. If you’re concerned about moisture damaging your tabletop, place a plastic tablecloth under the newspaper.

low.country.boil.10_butteryum.jpg

Bruno's Authentic French Vanilla Ice Cream

Patricia @ ButterYum

Bruno Albuze - French Vanilla Ice Cream Recipe.  Authentic French Vanilla Ice Cream Recipe. How to make real French vanilla ice cream.  French Custard Ice Cream Recipe,

So it’s officially the last week of summer and I can’t let the season end without sharing this recipe that comes from a classically-trained French Pastry Chef, who was given the recipe by an authentic Glacier (a professional ice cream maker in France). Sheet gelatin and commercial kitchen techniques result in the creamiest, most amazing French Vanilla Ice Cream imaginable. It’s Michelin star-worthy.

Please note - the ice cream base should be made a day before processing in your ice cream maker.

Items used to make this recipe:

(affiliate links)


Authentic French Vanilla Ice Cream

makes 1 quart

Printable Recipe

Ingredients

  • 500g whole milk

  • 180g granulated sugar

  • 30g glucose or light corn syrup

  • 30g dry milk powder

  • 8g vanilla bean paste

  • 2g salt (see notes below)

  • 100g egg yolks (about 5)

  • 4g gelatin sheets

  • 300g heavy cream

Directions

  1. Soak gelatin sheets in a few cups of cold water for 5-10 minutes, then remove sheets and gently squeeze out excess water; set aside until needed.

  2. In a medium saucepan over medium heat, combine milk, sugar, glucose (or corn syrup), and salt together until the temperature reaches 113F (45c).

  3. Using an immersion blender, add dry milk to the warm milk mixture, then add the egg yolks and continue blending with the immersion blender until the mixture reaches 185F (85c); remove from heat.

  4. Use the immersion blender to add the gelatin sheets, followed by the cream and vanilla.

  5. Pour mixture into an airtight container and refrigerate for at least 24 hours to allow the flavors to mature.

  6. Process according to your ice cream maker’s instructions and serve right away or transfer mixture to a freezer-safe container for longer storage.

  7. To serve, allow frozen ice cream to soften at room temperature for 15-20 minutes before scooping.

Notes

  • Gelatin Sheets - don’t be too concerned with the “bloom strength” of the sheet gelatin you use for this recipe. Just be sure the total weight is equal to 4 grams.

  • Standard digital scales are great for weighing most ingredients, but they’re not so great when weighing very minimal amounts. When weighing just a few grams, like the salt in this recipe, it’s best to use a precise digital gram scale. If you don’t have a digital gram scale, you’ll have to approximate. For reference, 1 teaspoon of table salt weighs 5.69g so you’d need approximately 1/3 teaspoon table salt for this recipe (the volume would differ if using kosher salt).

  • For the best flavor, be sure to refrigerate the ice cream base for 24 hours before processing in your ice cream maker.

adapted from Bruno Albouze