contact us

Use the form on the right to contact us.

You can edit the text in this area, and change where the contact form on the right submits to, by entering edit mode using the modes on the bottom right.


123 Street Avenue, City Town, 99999

(123) 555-6789

email@address.com


You can set your address, phone number, email and site description in the settings tab.
Link to read me page with more information.

Blog

Butteryum food blog recipes

Filtering by Category: sandwich recipes

Onigiri

Patricia @ ButterYum

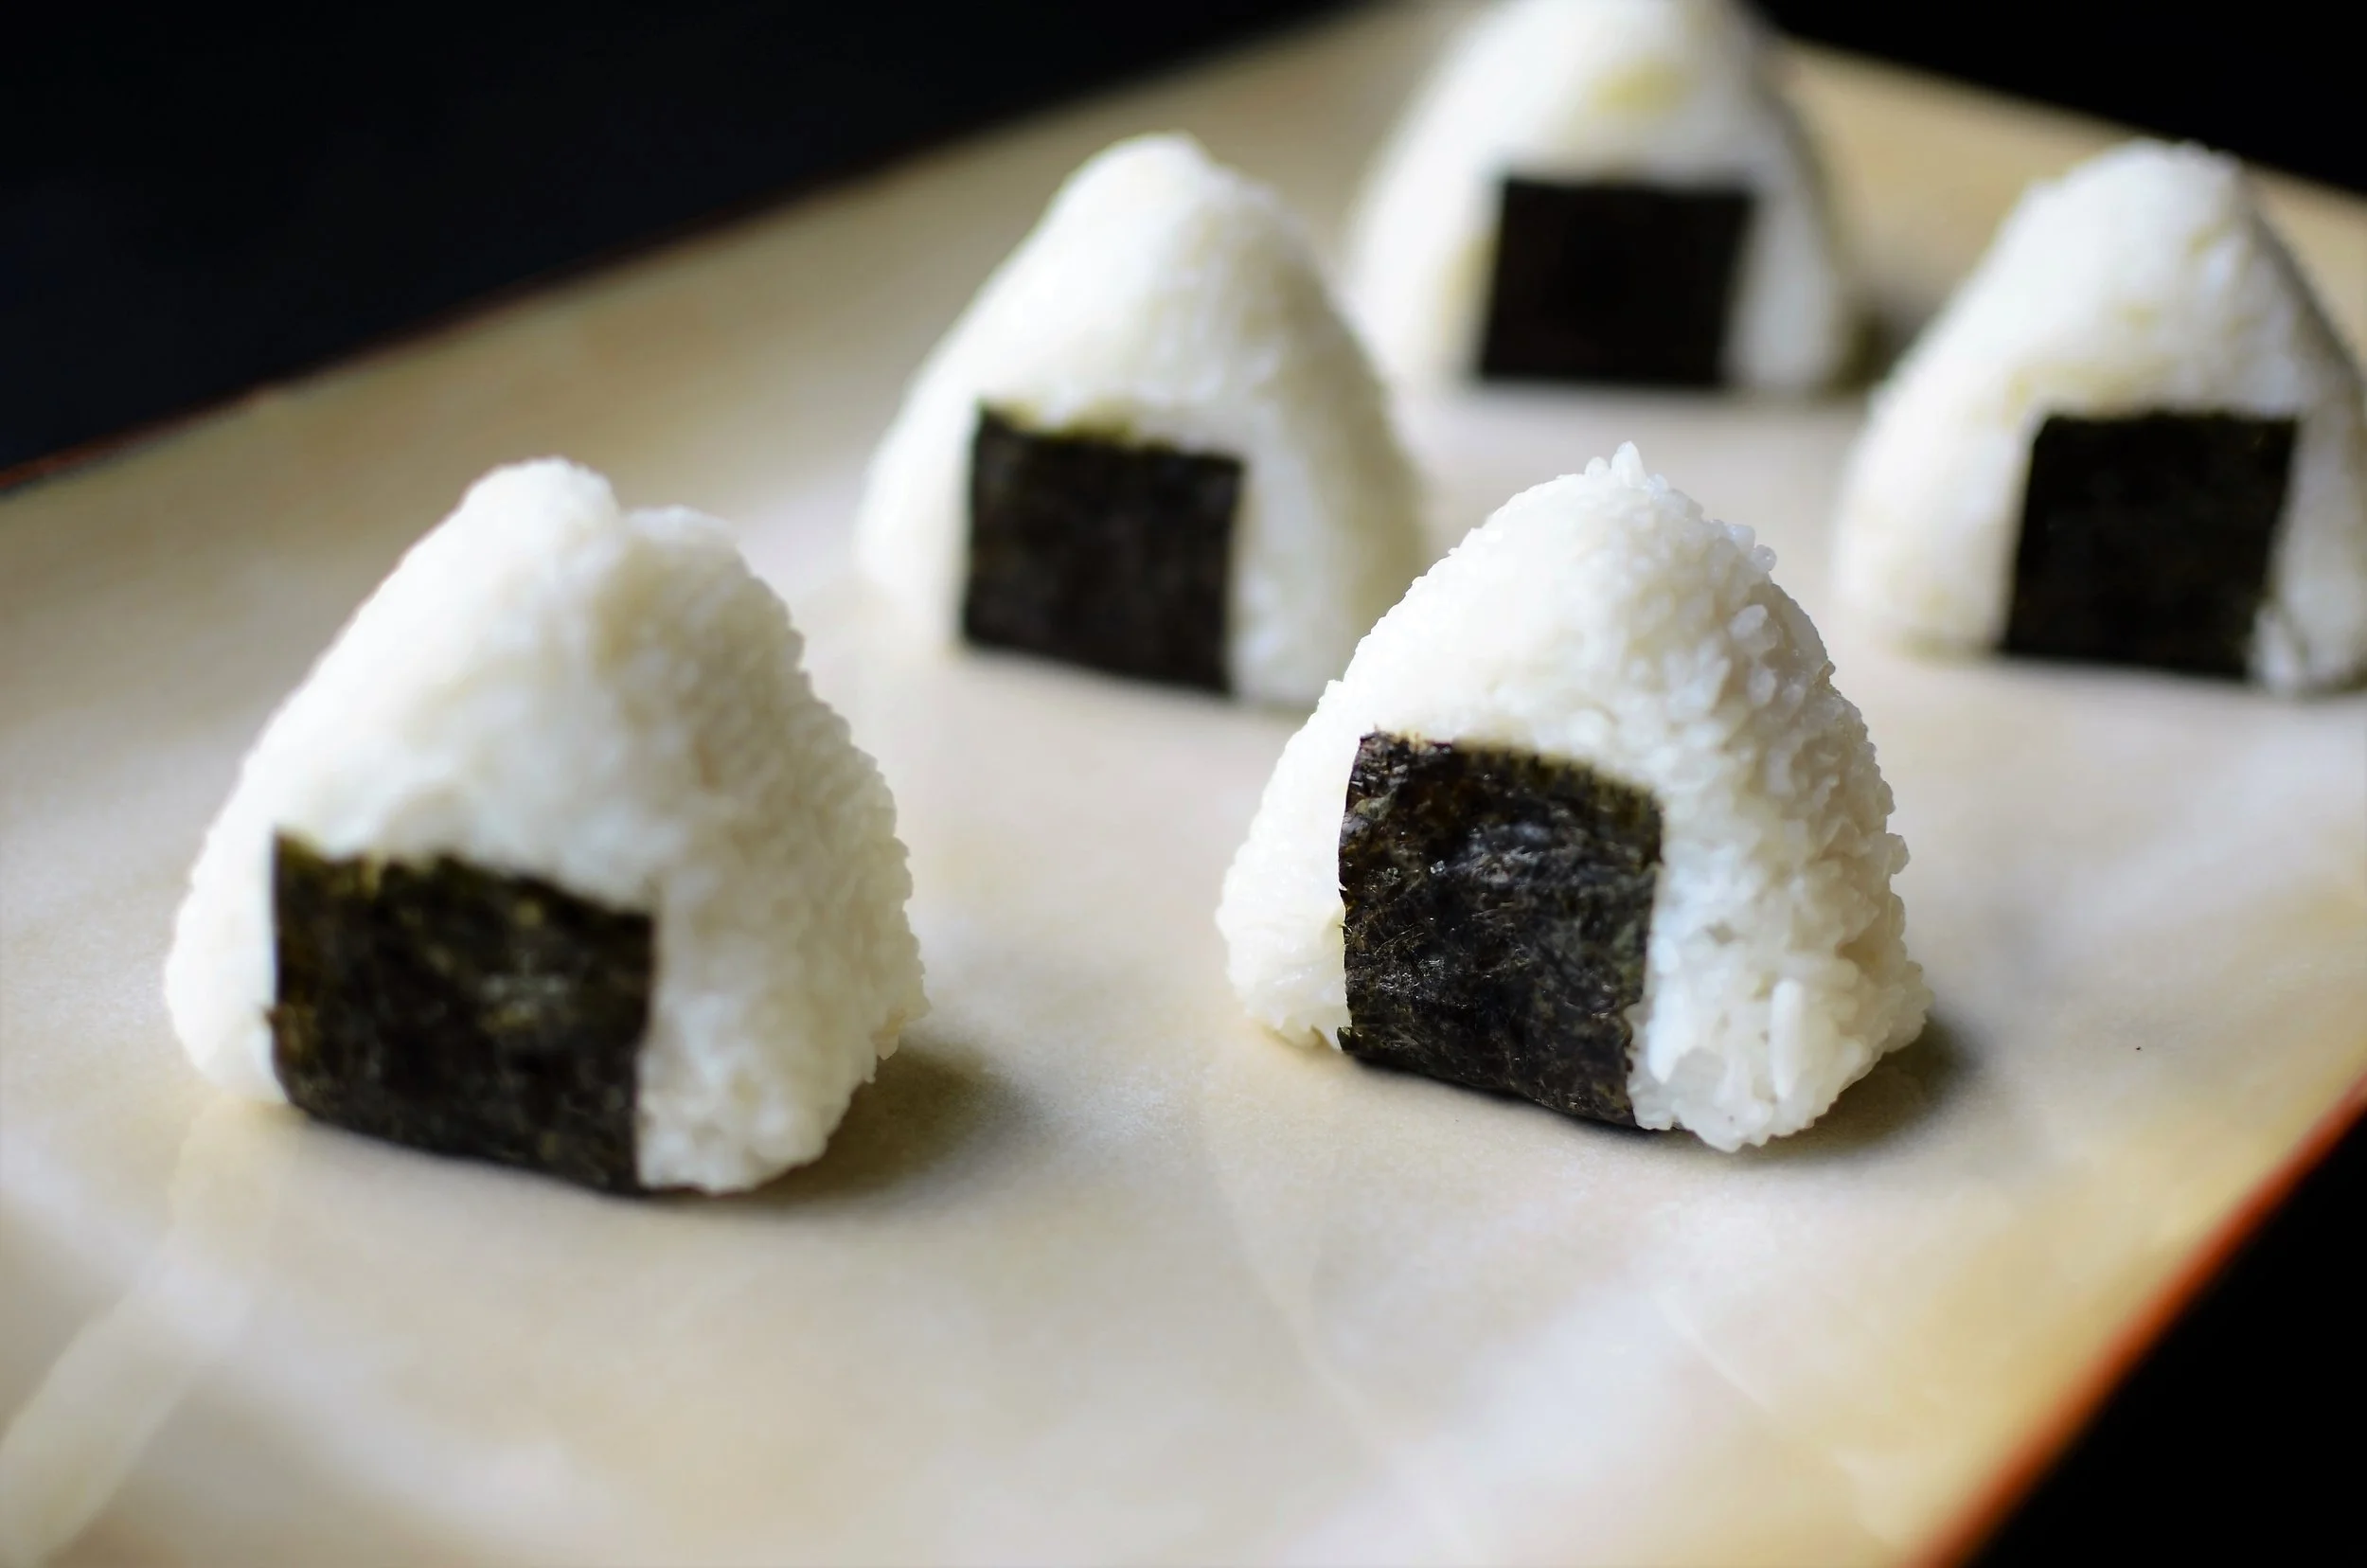
One of my daughters is a Japanophile and she loves to introduce us to Japanese foods that are completely unfamiliar to us.  Foods like these onigiri (oh-nee-gee-dee), a rice ball or sorts.  They're kind of a rice sandwich filled with something savory like chicken or tuna salad.  The salty filling pairs so beautifully with the rice and a strip of nori is wrapped around for flavor and color contrast.  They're easy to make in the palm of your hand, but the triangular molds we used are even more fun.  Here's how they're made.

ElectricRiceCooker

Start with about 3 cups of cooked rice.  I usually cook my rice on the stovetop, but my daughter loves any excuse to pull out the rice cooker

how to make onigiri, japanese rice balls - how to photos

Sushi rice is the typical rice used to make onigiri, but any rice that will stick together when compressed will work.  When you're shopping, look for Japanese medium or short grain rice. 

how to make onigiri - recipe with how to photos

As I said, you can form these in the palm of your hands, but using onigiri molds is kind of fun.

onigiri filling - japanese rice balls, recipe and how to photos

You'll also need a savory filling.  Today we're using my rotisserie chicken salad.  If you're interested in my yummy recipe, here it is.

how to make onigiri, japanese rice balls - recipe and how to photos

You'll also need nori sheets.  They're the same sheets you might use to make sushi. 

DSC_6517.JPG

Cut the sheets into 1-inch wide strips that are 3.5 to 4 inches long.

Alrighty, time to make these adorable onigiri.  Keep a small bowl of water nearby to dip your fingers into.  Sticky rice won't stick to your fingers if they're damp.

how to make onigiri, o-musubi, nigirimeshi (japanese rice balls) - recipe with how-to photos

Press a tablespoon or two of rice into the bottom half of an onigiri mold, pressing it across the bottom and up the sides, leaving an indentation for the filling.

how to make onigiri, o-musubi, nigirimeshi (japanese rice balls) - recipe with how-to photos

Add a tablespoon or so of tuna salad or chicken salad.

how to make onigiri, o-musubi, nigirimeshi (japanese rice balls) - recipe with how-to photos

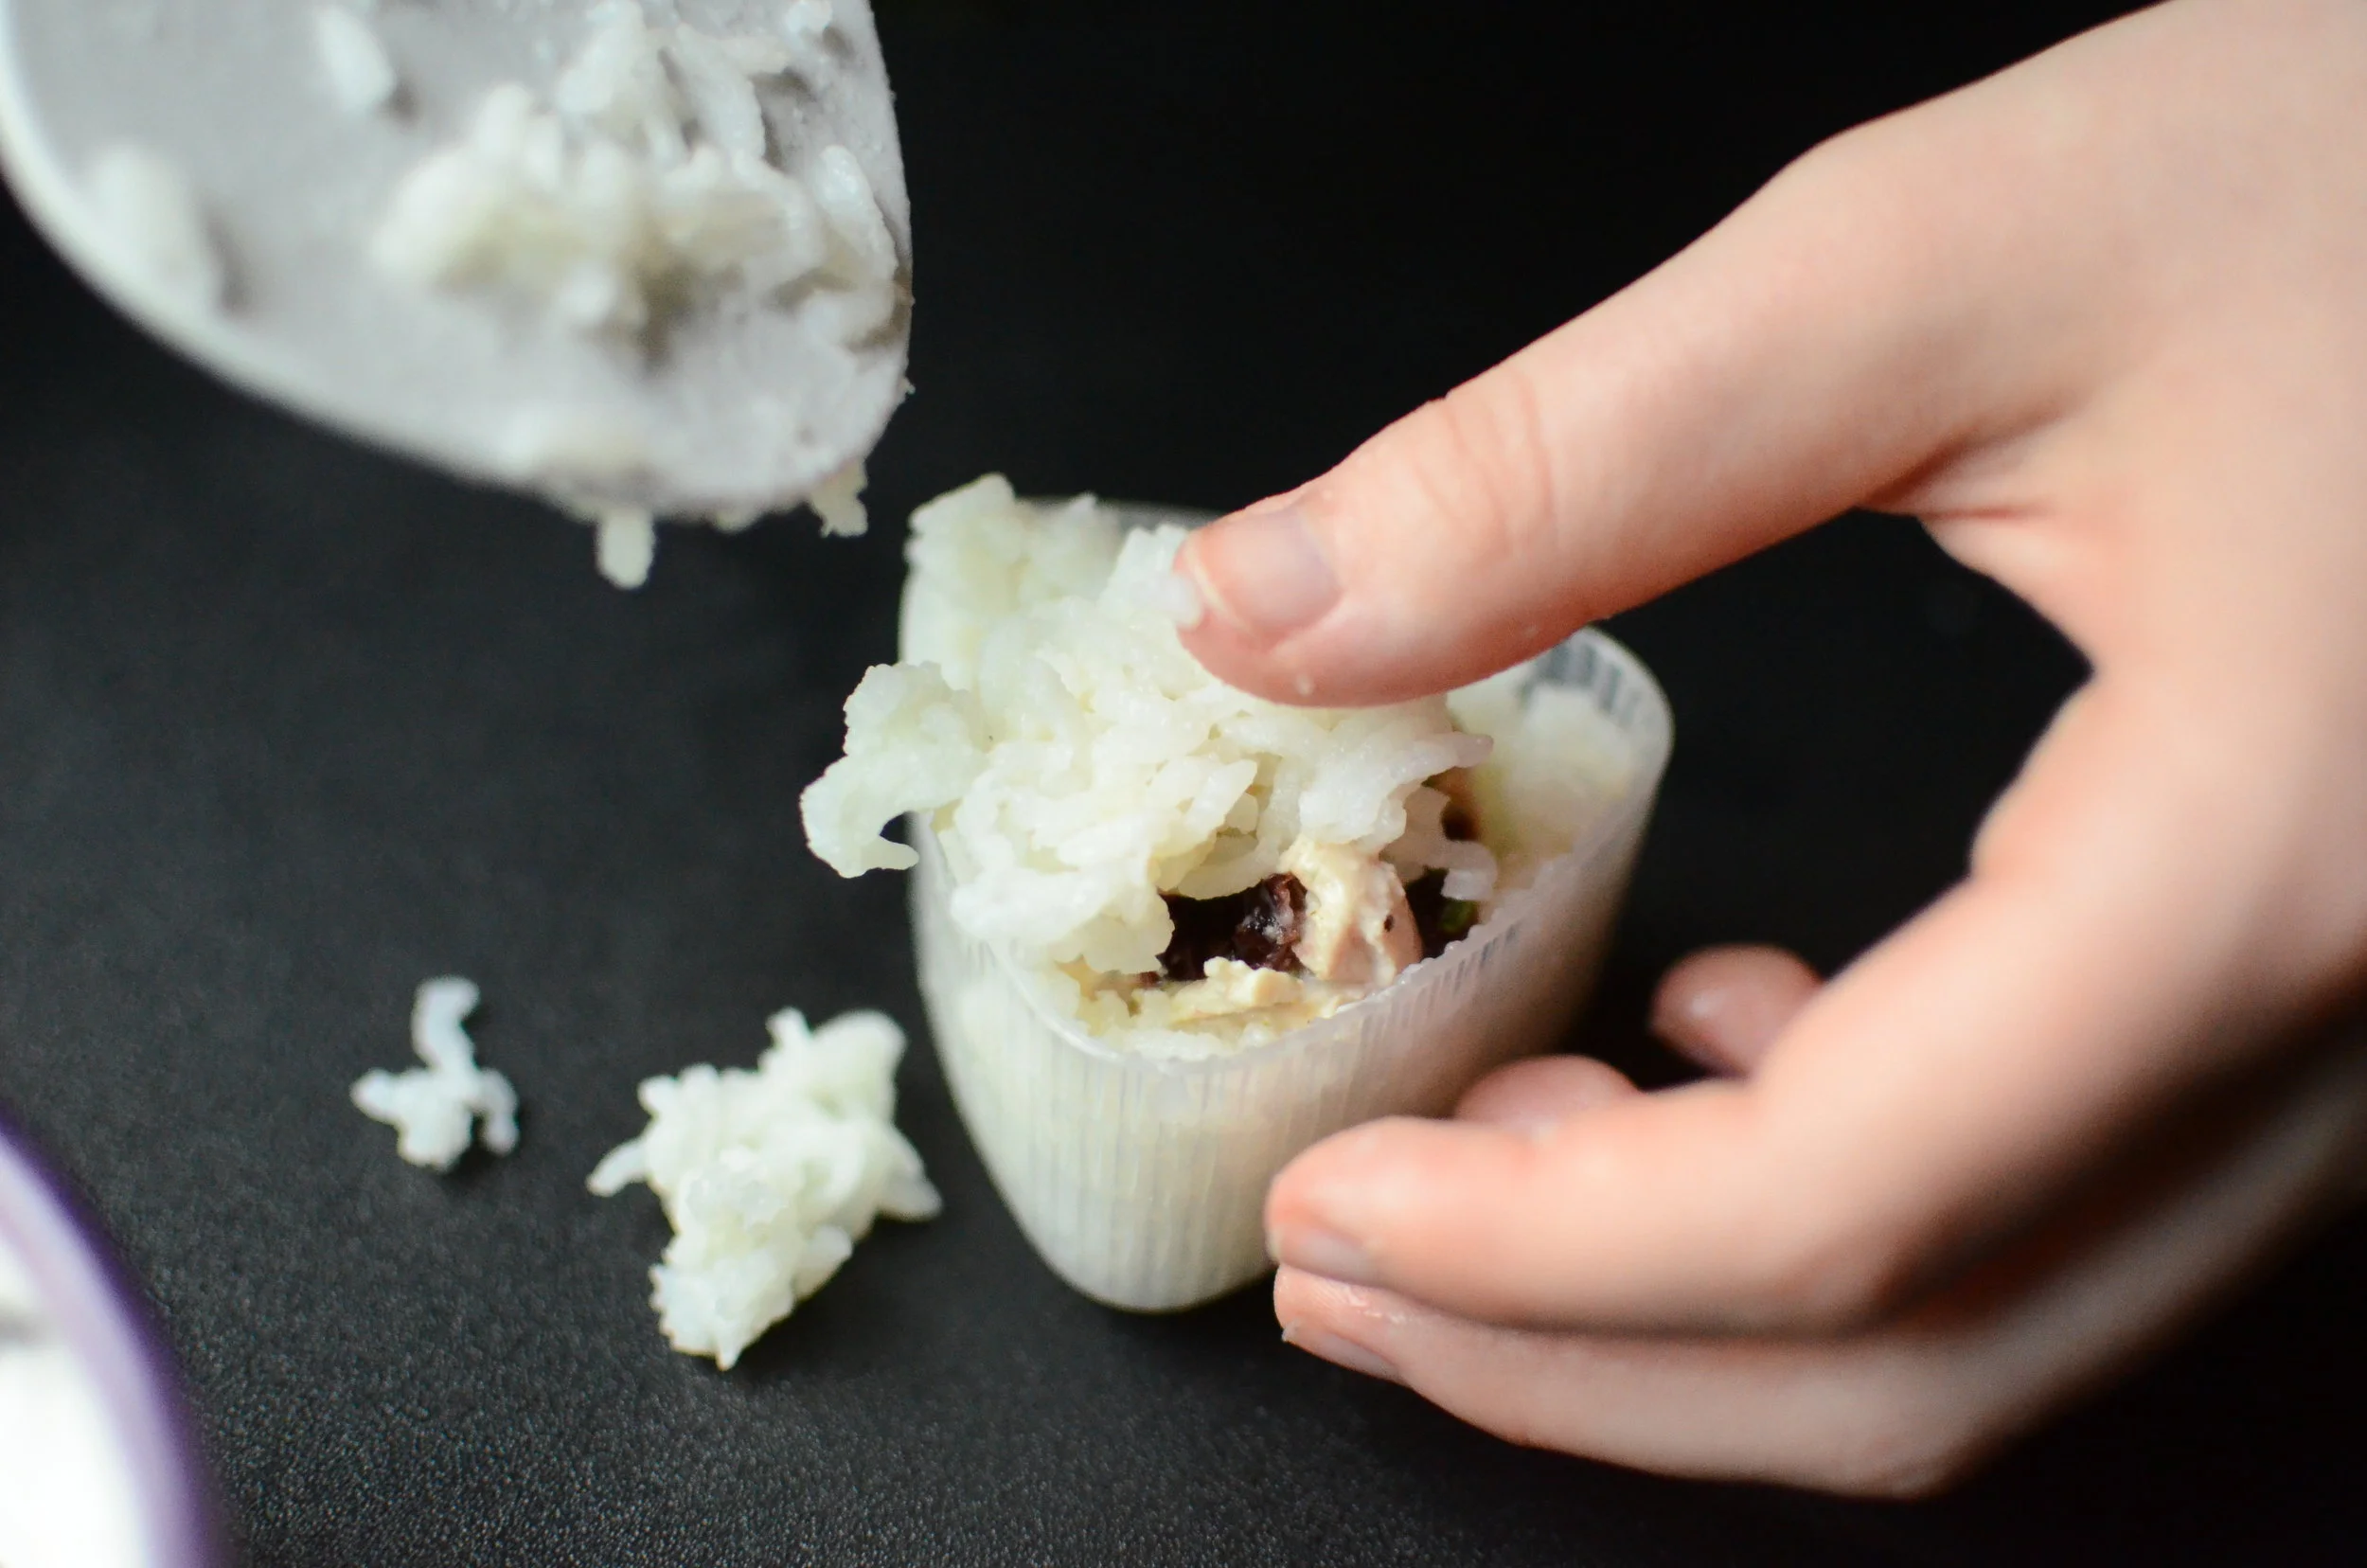
Cover the filling with more rice.

how to make onigiri, o-musubi, nigirimeshi (japanese rice balls) - recipe with how-to photos

Fill the mold to the top.

how to make onigiri, o-musubi, nigirimeshi (japanese rice balls) - recipe with how-to photos

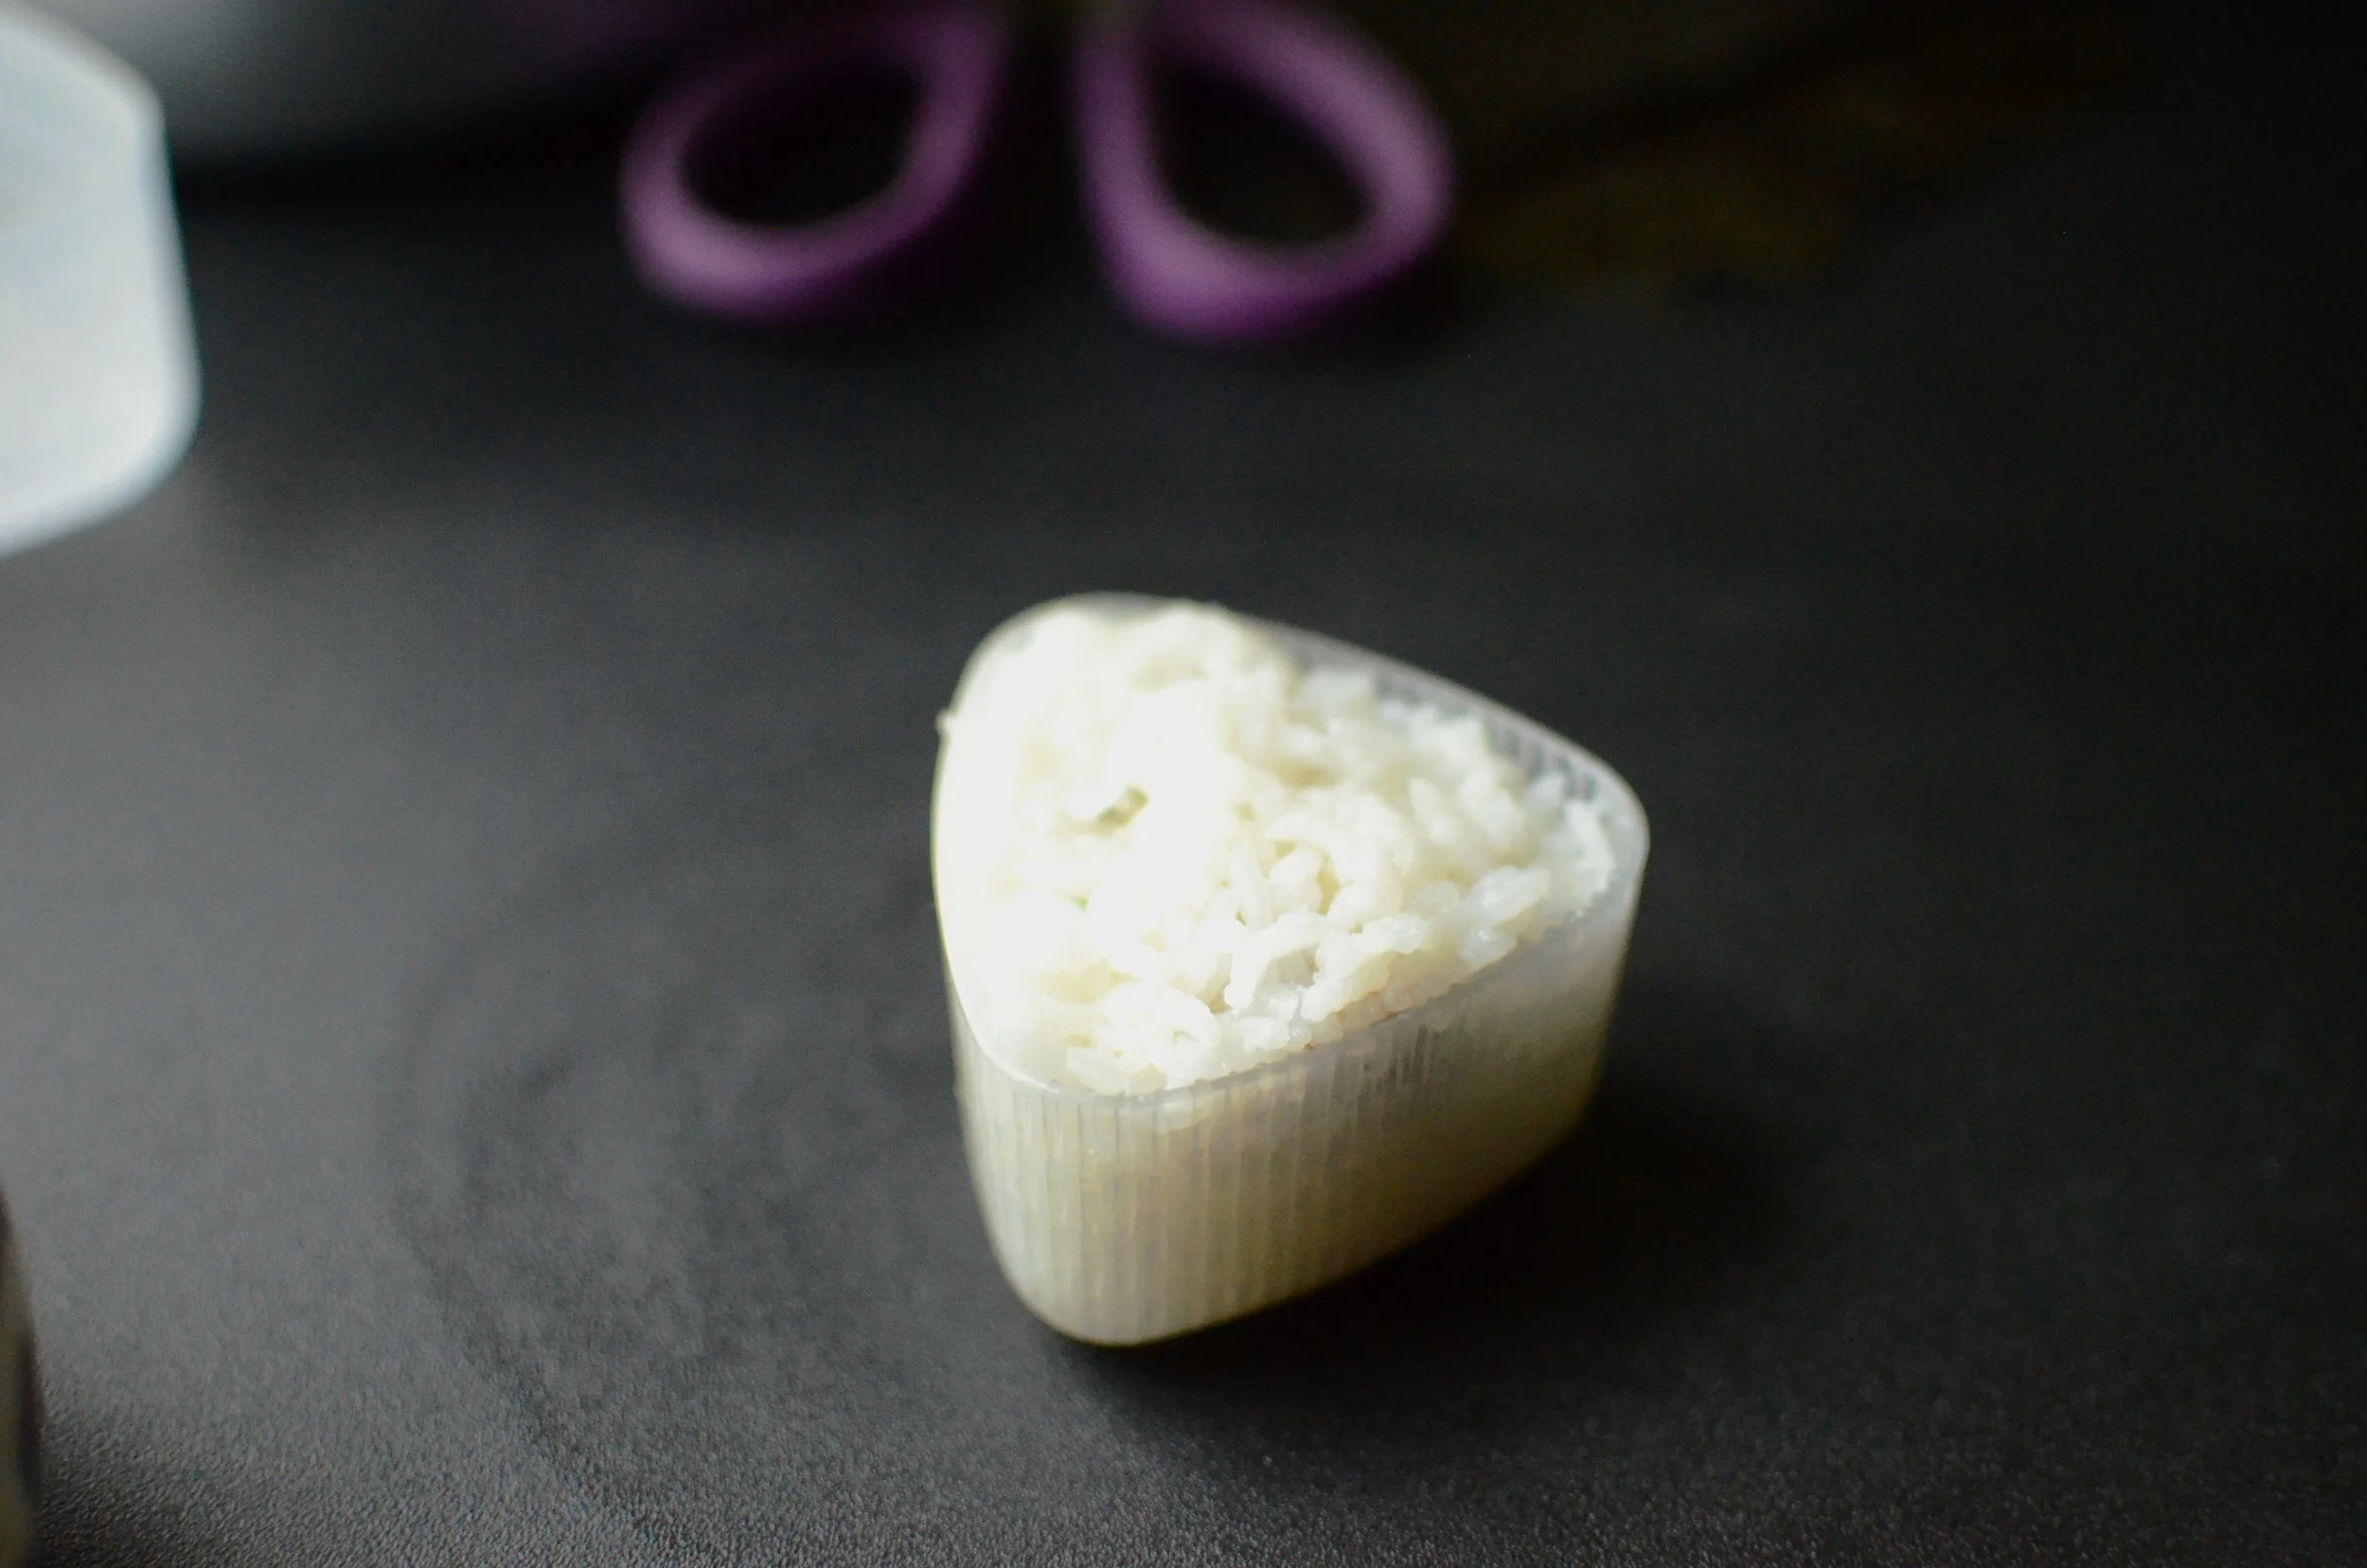
Place the lid on top and press gently to squeeze everything together.

how to make onigiri, o-musubi, nigirimeshi (japanese rice balls) - recipe with how-to photos

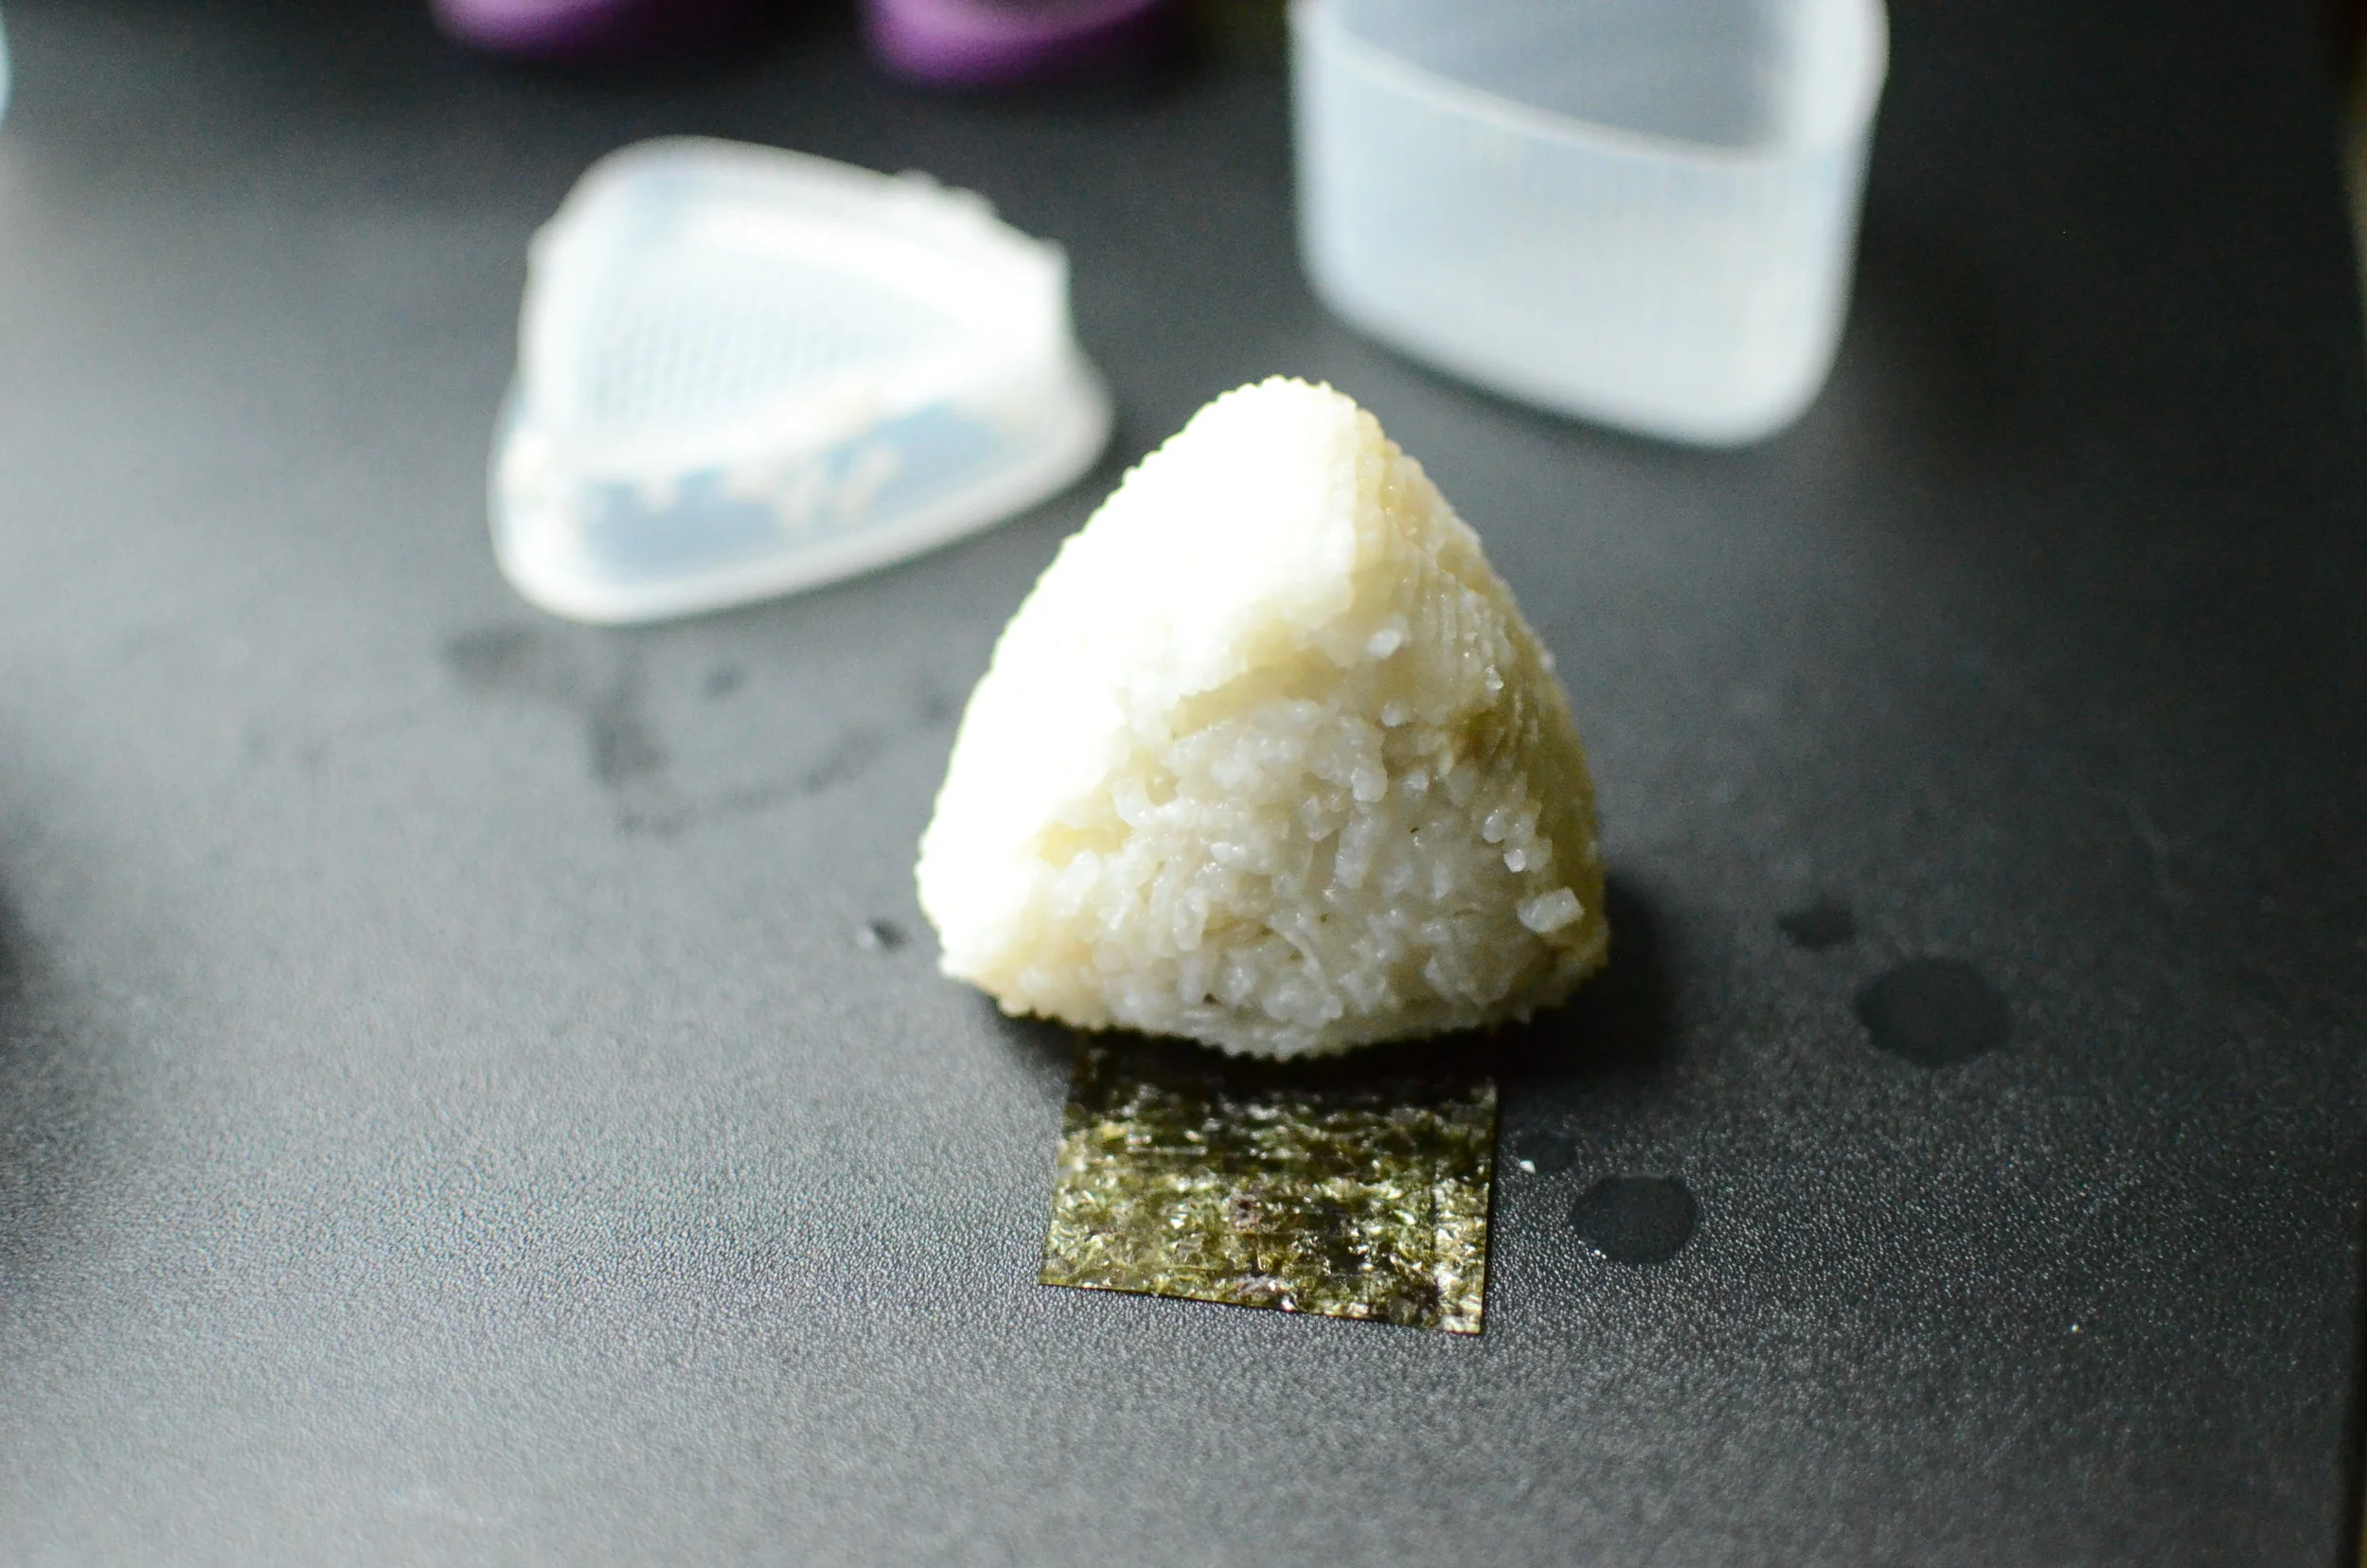
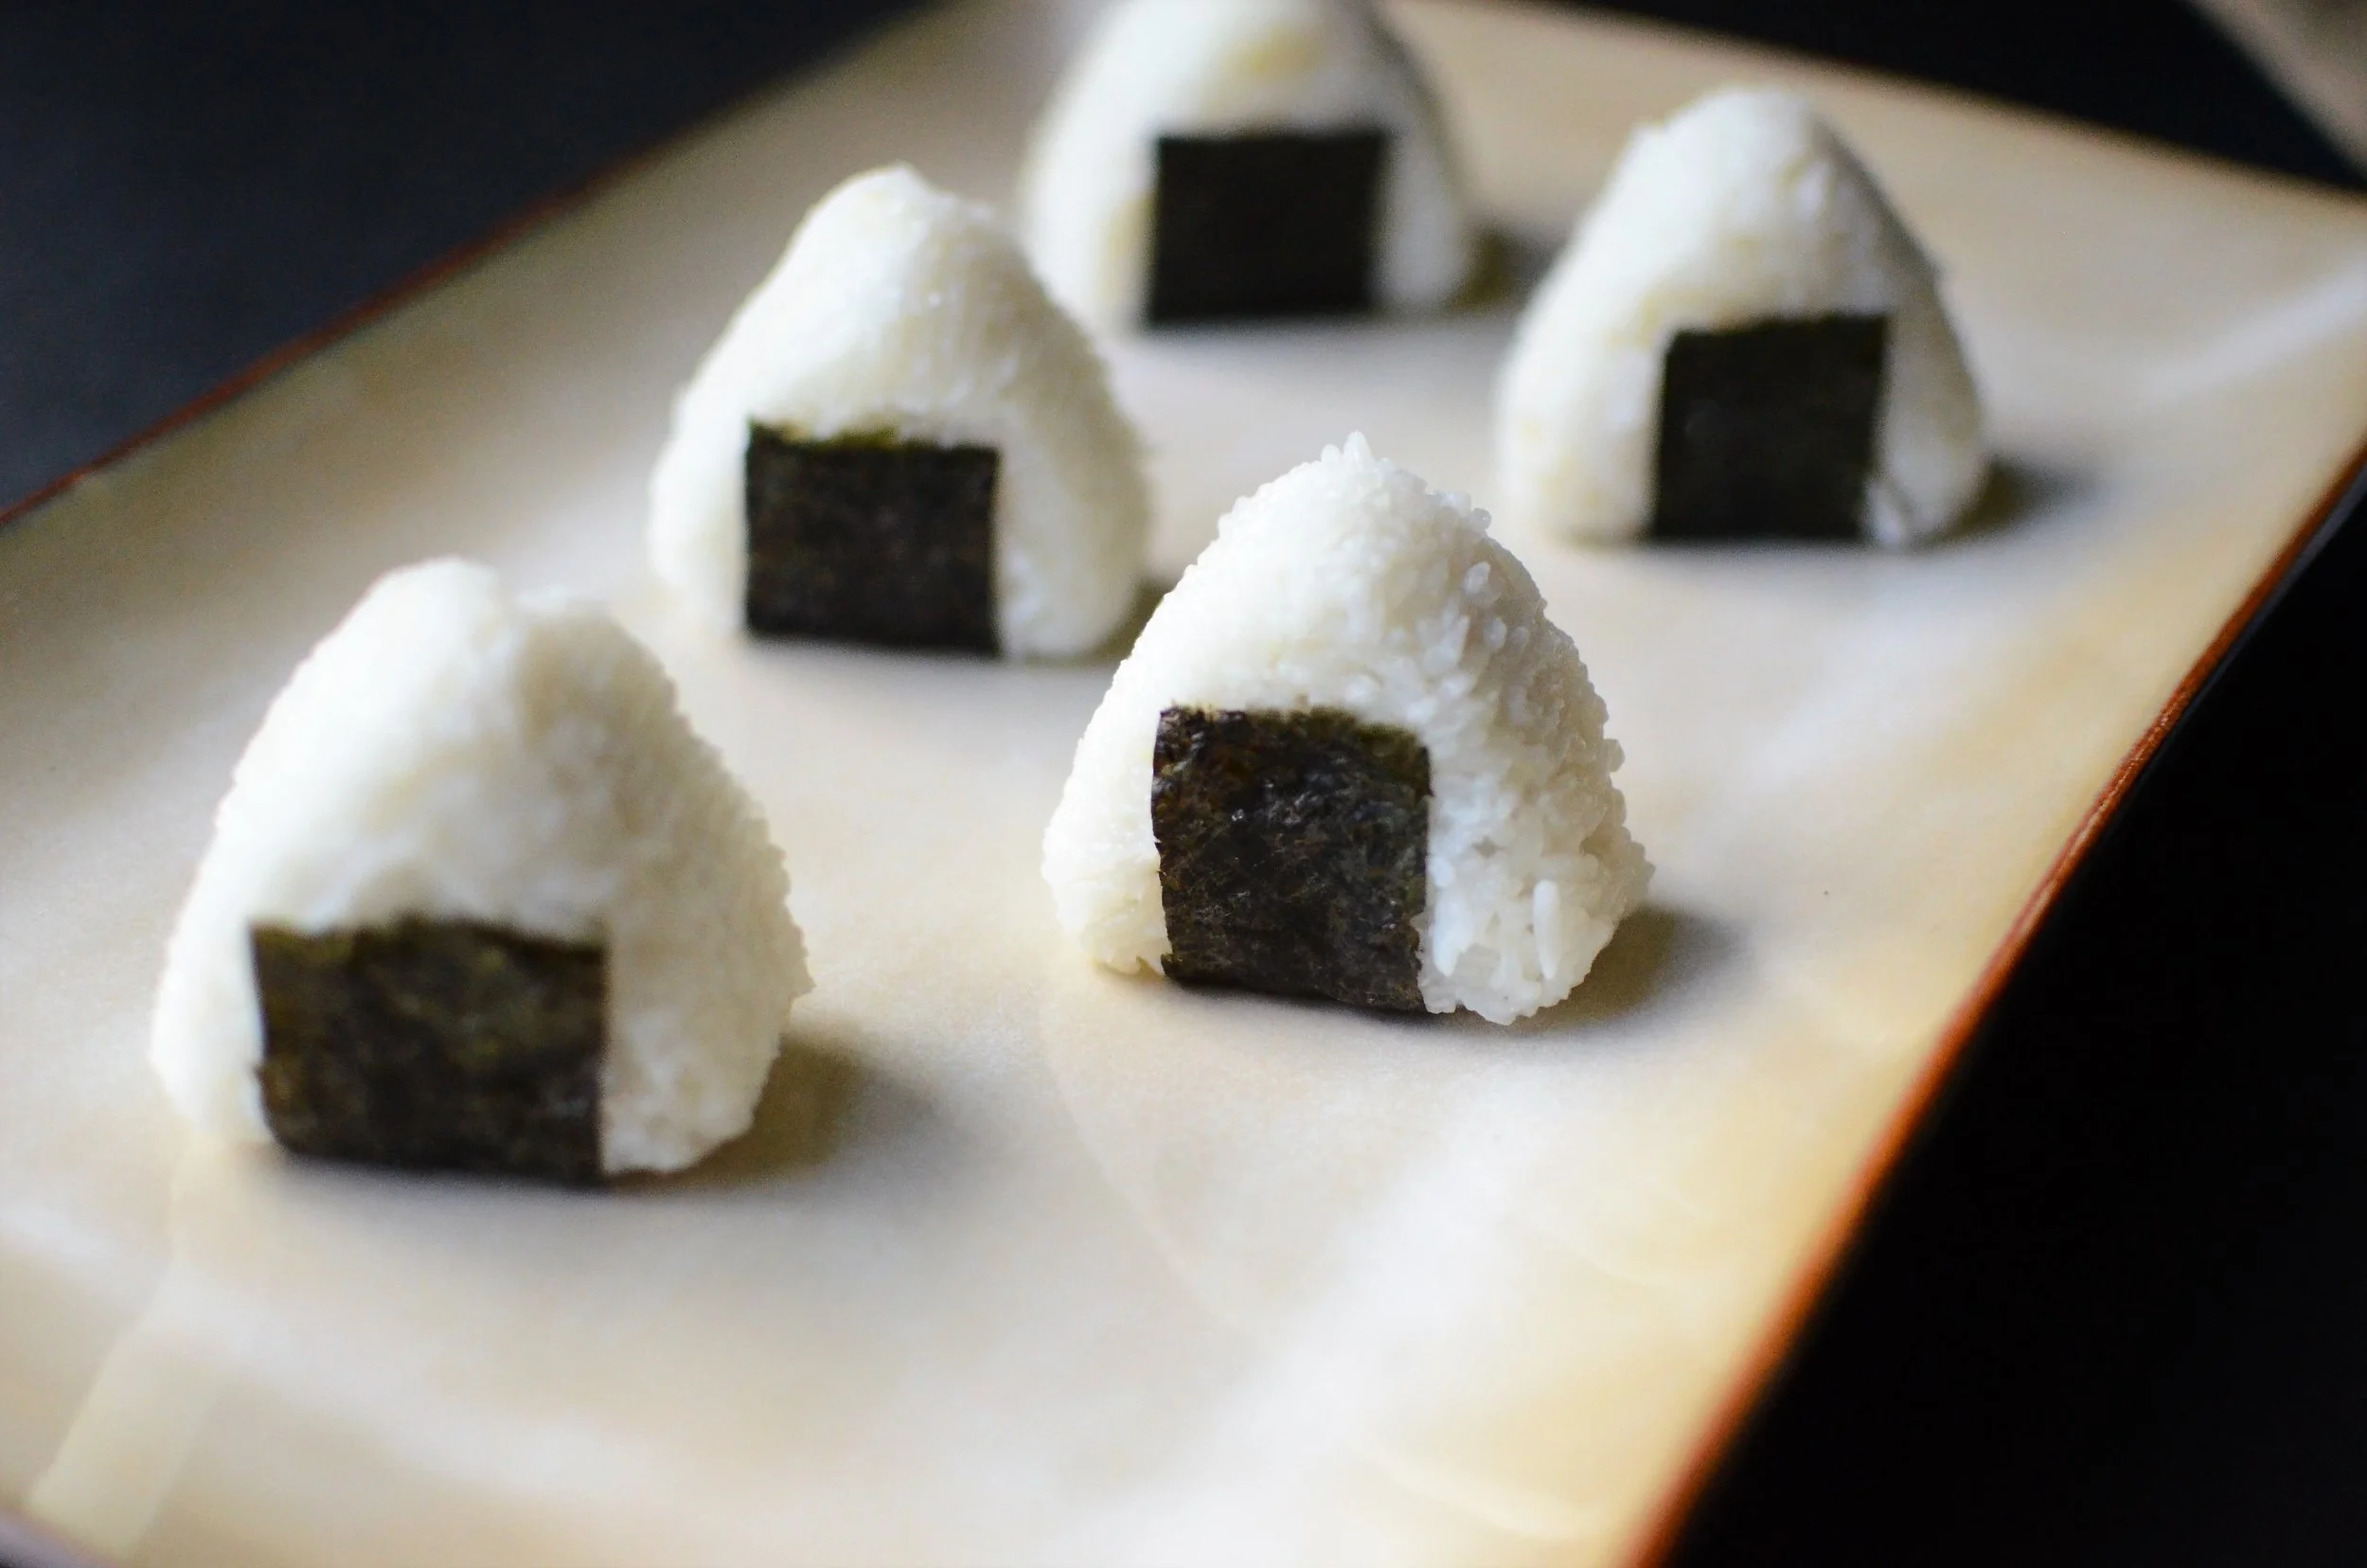
Gently unmold and place formed onigiri on a strip of nori.

how to make onigiri, o-musubi, nigirimeshi (japanese rice balls) - recipe with how-to photos

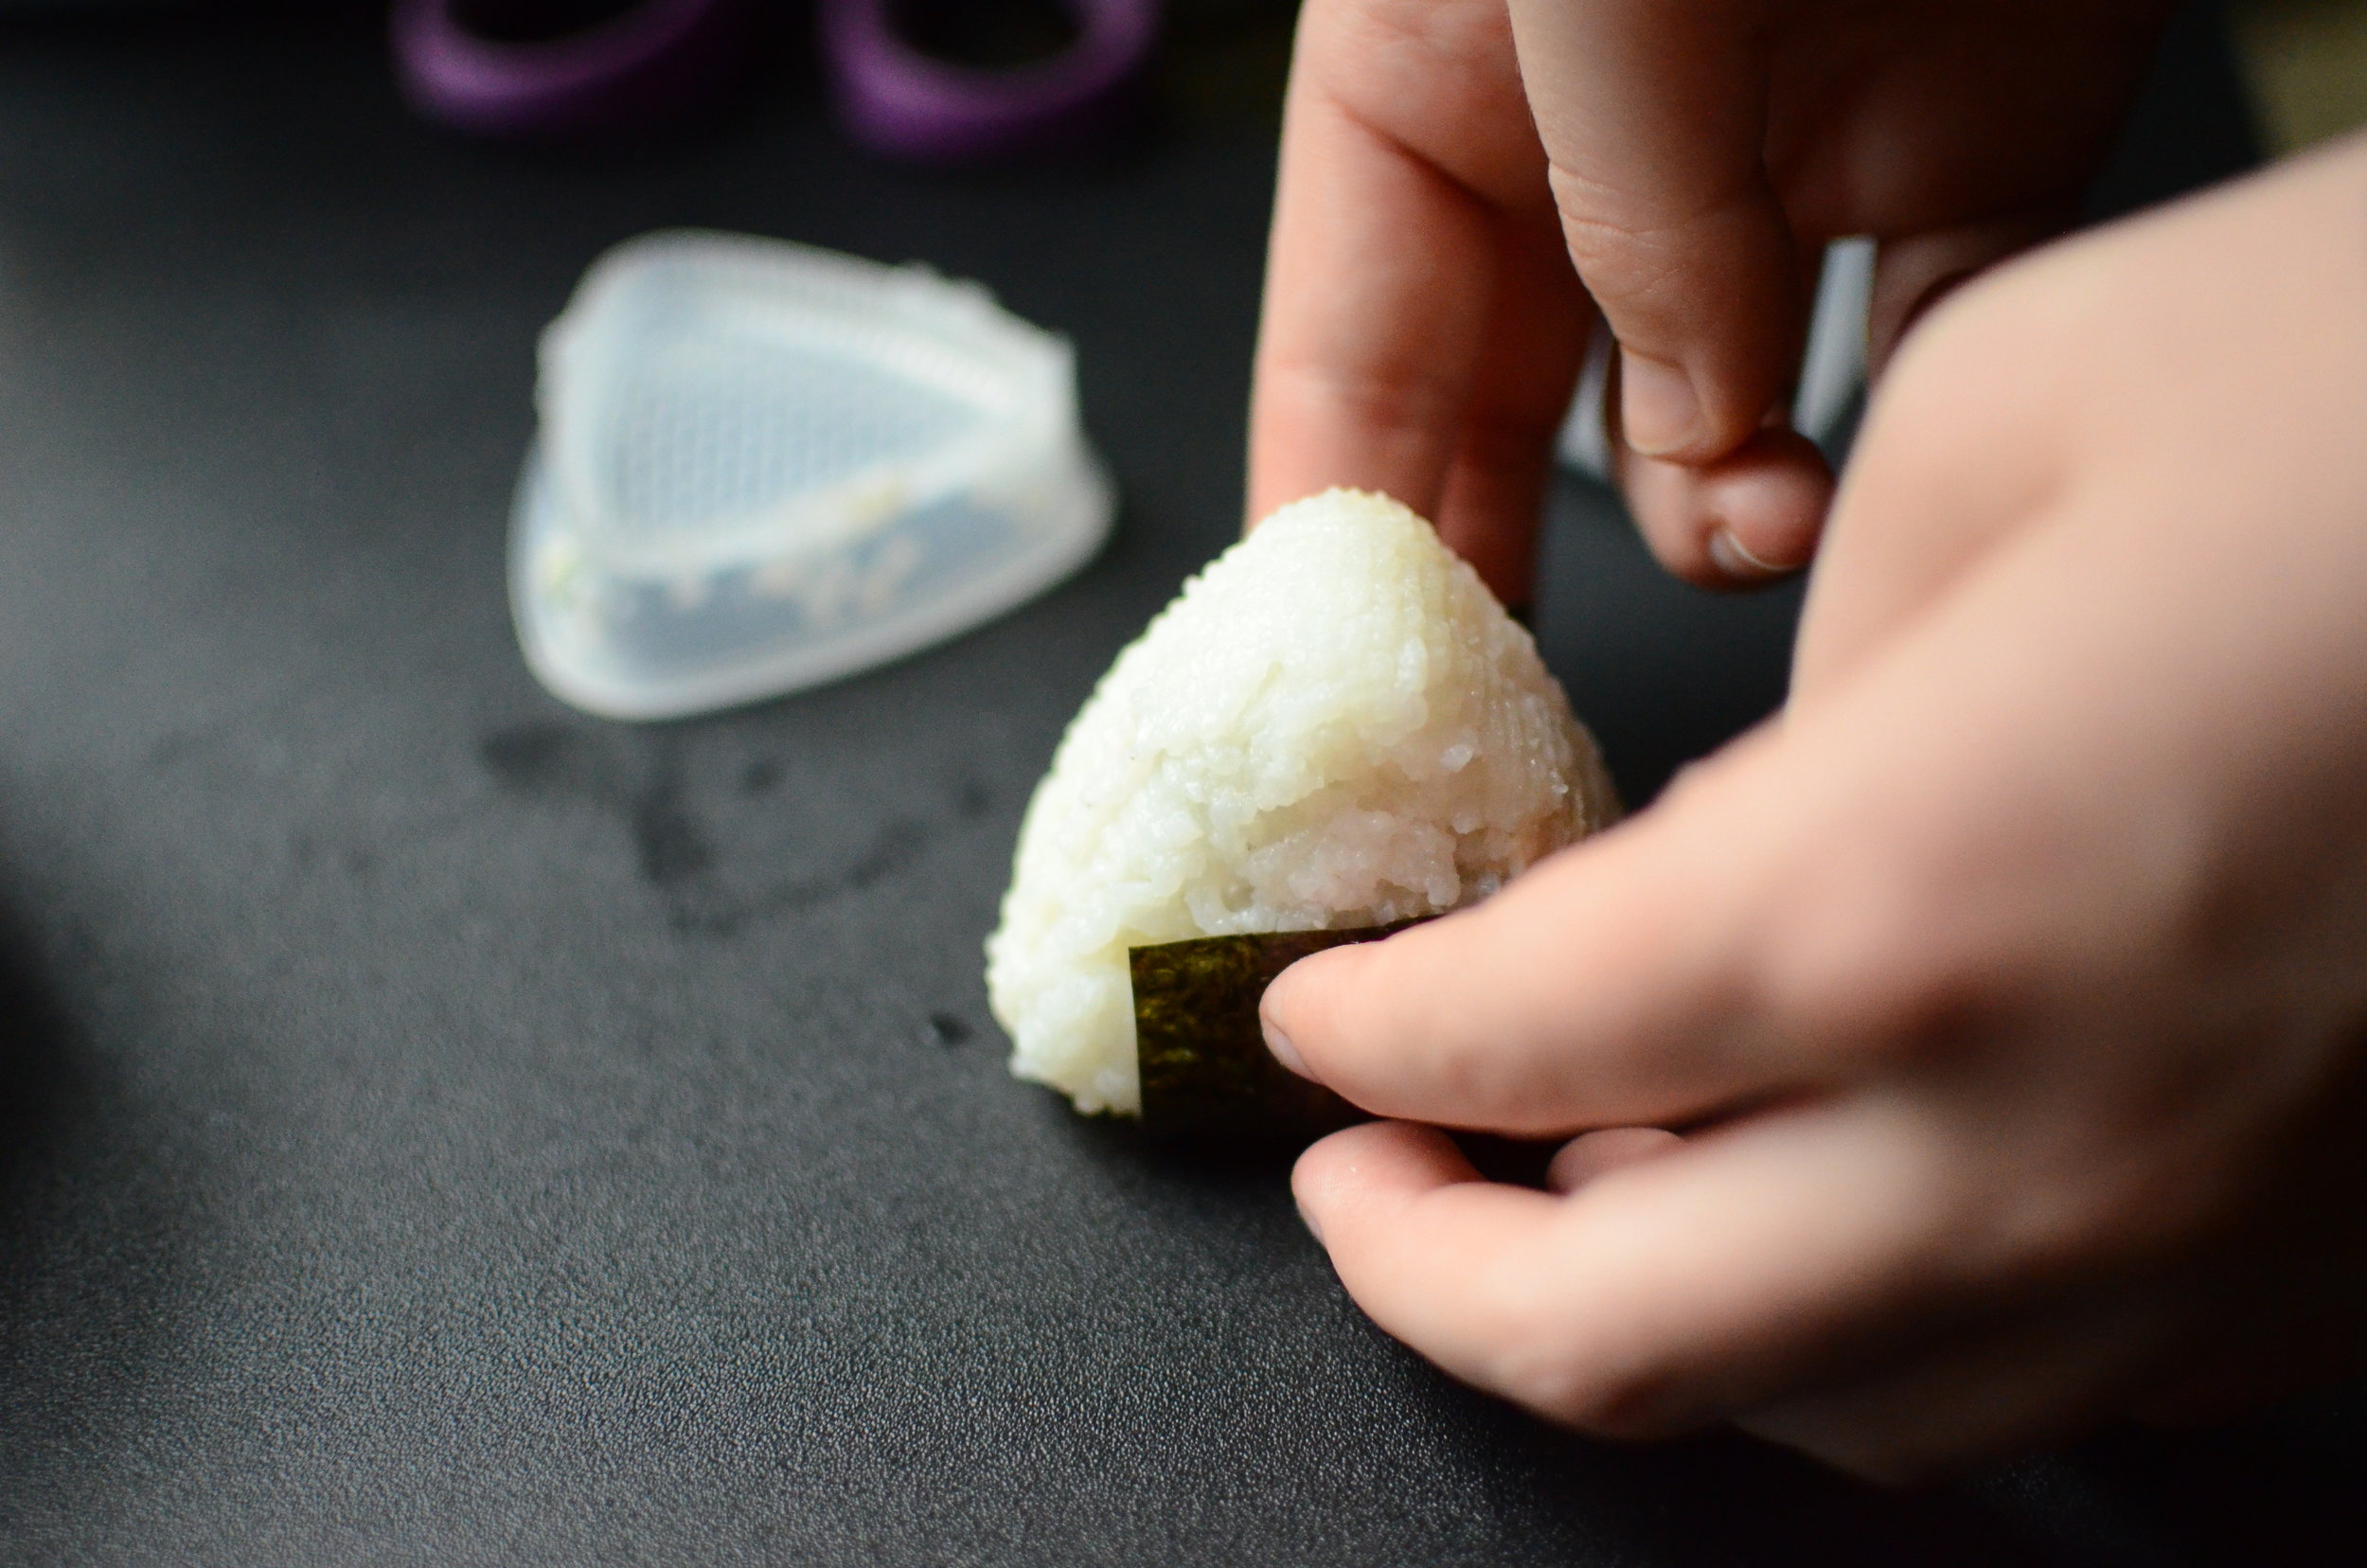
Pull the ends of the nori up to wrap the onigiri.

how to make onigiri (japanese rice balls) - recipe with how-to photos

Ta-da!  That's all there is to it.  Now you're ready to dig in. 

how to make onigiri, o-musubi, nigirimeshi (japanese rice balls) - recipe with how-to photos

Enjoy! 

Items used to make this recipe:

(affiliate links)


Onigiri

makes 8-12

Printable Recipe

Ingredients

  • 3 cups cooked sushi rice (or any rice that sticks together when compressed)

  • 1 cup tuna or chicken salad (try my rotisserie chicken salad recipe here)

  • 1 sheet nori seaweed, cut into 1-inch wide strips, then cut each strip in half to make 2 shorter strips (each should be 1-inch wide by 3.5 to 4 inches long).

Directions

  1. Place a few tablespoons of rice in onigiri mold, pressing across the bottom and sides of mold, but leaving an indentation for the filling.

  2. Place a tablespoon of savory filling like tuna salad or chicken salad in center of rice; cover with more rice until mold is filled.

  3. Place lid on mold and gently press to compress rice; remove lid and carefully unmold by pressing the release tab on the back of the mold.

  4. Place nori strip on table, shiny side down, and place onigiri on strip as shown; pull both ends of nori up on each side of the onigiri and serve immediately.

Skinny Italian Sausage and Peppers

Patricia @ ButterYum

Skinny Italian Sausage and Peppers - ButterYum

Everybody loves sausage and peppers, but let's face it, serving it on an Italian sandwich roll makes for a very heavy meal which is basically straight up man food.  But here's my lighter, low-carb take that is satisfying enough to keep your man, or anyone else for that matter, very, very happy.  And here's a bonus, you can make the whole thing in one pan.  Let me show you how it's done.

Start by heating some really good extra virgin olive oil in a large heavy-bottomed skillet or dutch oven over medium-high.

sweet.italian.sausages

Add Italian sausage links - use hot or sweet (mild), whichever you prefer.  Today I'm using sweet.

cooking.sweet.italian.sausage

Turn the sausage links so they brown on all sides.  If the links stick, they're not ready to turn.... don't force them... they will release when they're ready.  

mild.italian.sausage.links

Remove sausages from the pan when they're sufficiently browned.  They're not cooked through at this point, so don't be tempted to taste yet.

onions.bell.peppers

Next we'll add the peppers and onions to the same pan.  I love to use a colorful mix of bell peppers.  Also, if you want your onions to hold their shape well, cut them from pole to pole; if you want them to break down, cut them across the equator.  For this recipe, I like them to hold their shape so I cut them from pole to pole.

cooking.onions.and.peppers

Add the salt and pepper too.  This will not only flavor the veggies, but it will help them start to release their juices, which will dissolve the browned bits the sausages left in the pan.  Mmmm, we're building lots of flavor here.  Stir every now and then until the veggies soften a bit.  

This would also be a good time to add a pinch or two of crushed red pepper flakes if you like.

minced.garlic

Now it's time to add minced garlic.  Lots and lots of yummy garlic.

Oh man... this is going to be soooooo good.

And now dried oregano, just because.  Continue to cook, stirring often...

I'm dying here.  My kitchen smells amazing!

chopped.tomatoes

Alrighty - now I'm going to break tradition by adding a big, juicy, ripe tomato that I chopped into 1/2-inch pieces.  Get everything in there, seeds and all. 

Oh yes, it won't be long now.

cooking.skinny.sausage.and.pepper.recipe

Time to nestle those partially cooked sausages down into the onion and pepper mix.  

Bring mixture to a boil, then reduce heat to a simmer and cover. 

Simmer until the internal temperature of the sausage reaches 165F.  

how to make the best Italian Sausage and Peppers. italian sausage and pepper recipe,. skinny sausage and peppers recipe. how to make sausage and peppers at home.

Just before serving, toss in some fresh basil and parsley which will add lovely color and amazing flavor.  Serve immediately over pasta, on Italian sandwich rolls, or just place one or two sausages on a plate and top it with a generous helping of the pepper and onion mixture. Enjoy!

Items used to make this recipe:

(affiliate links)


Skinny Italian Sausage and Peppers

makes 3-4 servings

Printable Recipe

Ingredients

  • 2 tablespoons olive oil

  • 5 or 6 Italian sausage links, hot or sweet

  • 1 large white onion, sliced

  • 2 large bell peppers, sliced (any color)

  • 4 or 5 cloves garlic, minced

  • 1/2 teaspoon crushed red pepper flakes (optional)

  • 1 teaspoon dried oregano, crushed in the palm of your hand

  • 1 large tomato, diced (optional)

  • fresh chopped parsley and basil (optional)

  • Italian sandwich rolls (optional)

Directions

  1. In a large skillet over medium heat, brown sausage links in oil until brown on all sides; remove from skillet and set aside.

  2. Lower heat to medium-low and saute the onions and bell peppers in the same skillet until the onions are translucent.

  3. Add the garlic, crushed red peppers, and oregano; continue sauteing until the onions start to caramelize.

  4. Add the sausage links back to the pan (and add the chopped tomato if using); reduce heat to low and cover pan until sausage reaches 165F.

  5. Serve immediately over pasta, on Italian sandwich rolls, or just place one or two sausages on a plate and top it with a generous helping of the pepper and onions mixture.

Alternative Cooking Method:

  • Here’s what to do if all you have on hand is frozen sausage. Place 1 cup of water and a steam rack into the inner pot of an Instant Pot. Place the frozen sausage links on the rack. Seal the Instant Pot and steam on “manual” or “high pressure” for 25 minutes. While the sausages steam, make the rest of the recipe in a skillet. When the sausages are done steaming, place them into the skillet and simmer for 5 minutes. The sausages won’t be as brown as the recipe above, but they’ll be extra tender.